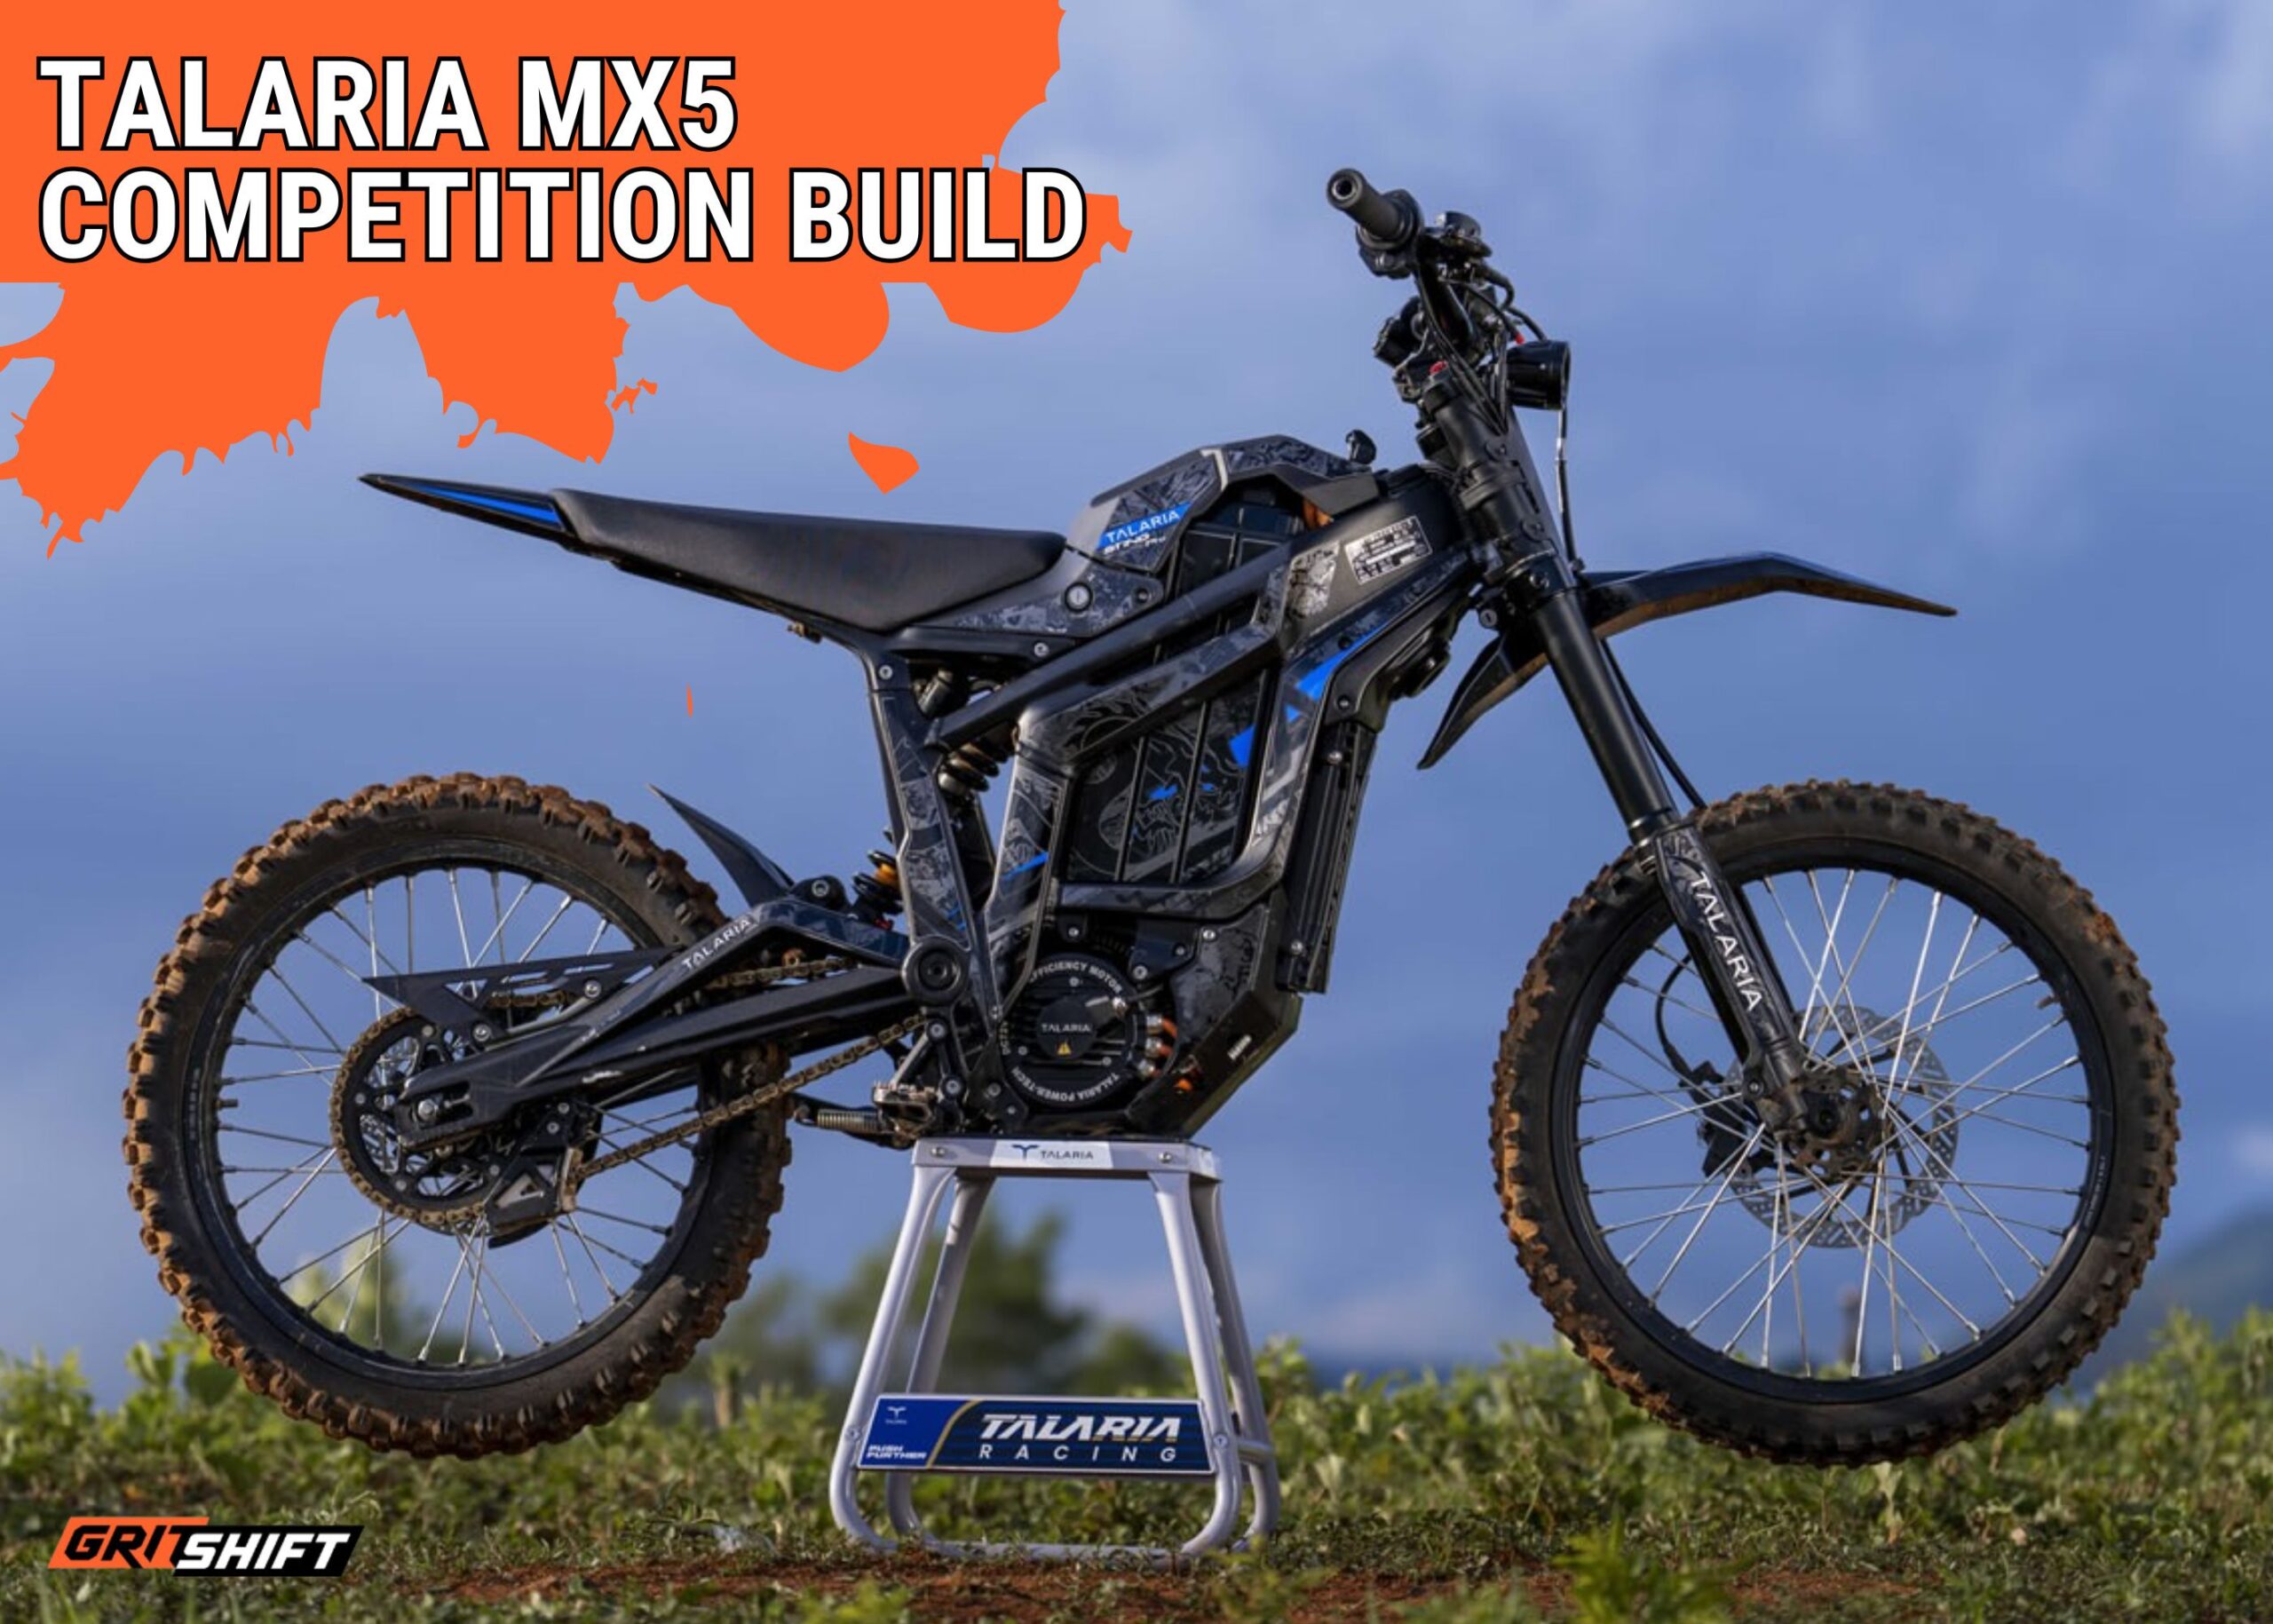

Are you looking for your next competition-ready electric dirt bike? Or a bike that will out-ride all your mates? There are plenty of awesome builds that you can do, that all start from something like a stock E Ride Pro, Surron LBX, or Talaria Sting. The hardest part is working out which frame to start with, then how far to take the modding process.
Or maybe the hardest part for you is clicking the checkout button with $10,000 of parts in the cart for a bike you paid half that for last weekend on Marketplace. If that’s you, you’re in luck – you’re about to build the ultimate MX5 track weapon, no expense spared!
We’ll chat about the Talaria MX5 in this article, although much of the information will be relevant to any brand. Then, we’ll go through the modding process from the start to the finish of a full competition-ready, podium placing, race bike. Of course, if you don’t need your bike to perform to the pro level, you can pick and choose which mods you need for your bike.
Keep in mind that every mod needs to be customized to you. Your style. Your body shape. Your type of riding. There is not a one-size fits all, so read through this list and have a think about what’s really necessary for your build.

We’ve been modding bikes for a long time, in fact that’s how GritShift all started. When we couldn’t get the parts we needed, we started creating them. And, when I say ‘we’, I really mean the in-house R&D team led by Rusty. I get the honor of writing about all the cool things they create! However, all of us at GritShift ride dirt bikes of some sort. I’m a weekend rider, others in our team are pro level competing and everything in between, so you could say we have a huge range of experience.
Disclaimer: The MX5 is a great e-moto in its stock form for most riders, so if you’re a weekend warrior, you’ll unlikely need these upgrades. This article is for those wanting to create a high-performance bike and those who ride well outside what Talaria had intended for their MX5.
Check out this article for some mods to make the ergos better.
Why The MX5?
Why start with the MX5? Well, there are many reasons, but firstly, you want to choose a bike that has a sturdy frame, a stiff swing arm, with good geometry that makes riding feel communicative. Anything else you can change, but the frame essentially needs to stay the same. Unless you have your own R&D team at home… Needless to say, the quality of the frame needs to be the first thing.
Then, you need to look for a bike that has some parts that you’ll be happy to keep. This keeps costs down and also the complexity of changing everything. The MX5 has a good amount of power and a 72v system stock, which, depending on the style of riding, you may not need to change. It also has some pretty decent brakes and even forks, but it all comes down to what you need the bike to do.
All of this makes the Sting MX5 a good starting point for a complex competition-level build. The MX5 has a robust chassis, strong swing arm, and 72v power from stock, all of which puts it ahead of competitors like the Surron LBX right out of the box.
Let’s start with the overview of the modding process. Skip to this section if you just want to read about the parts needed.
Modding process
These are the basic steps to take if you’re looking to do a full build, say for a TKO event to allow your MX5 to withstand the harsh riding conditions and everything that stands between you and the finish line. Again, if a full build isn’t needed, then only mod to the standard you need.
What’s TKO, you ask? Only the most gruelling race this side of a Red Bull pavilion.
Work out what type of riding you’ll be doing.
Do you need big power to launch your bike, and suspension to land triples around a SX track? Or maybe you’re looking to do a long range endurance loop, where a bigger battery would be high on your list.
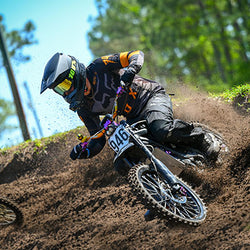
If it’s a TKO event – or any other hare scramble or hard enduro – then you’ll need to look at a bit of everything. You’ll need suspension to help you over the rock gardens, power to keep up and get in front of the other racers, and extra sturdy components that will withstand extended hard riding.
How do you start the process?
Sit down and have a think. This process is as much about prioritising as just doing. You want to make sure that you don’t buy a new part, only to replace it with something else in the near future if it’s not compatible.
Have a look at the next section of this article and work out which parts are most important for your style of riding. In other words, where are you going to put the most strain on your bike?
Write down the list of parts you think you’ll need. Then head to our website and research the parts to make this happen – I’ve included links below to make it a bit easier. Look at things like fitment. It’s obvious if they need to fit your e-moto, but do they fit any other aftermarket part you’re looking at getting? If you’re not sure at anytime, chat with our team who can advise you on your build and offer suggestions.
Then, think about the order that you’ll want to mod your e-moto in. Most of us don’t mod everything at once, that would take the bike out of service for too long – and the bank account usually says no! What parts are the most important? What parts are easy to get to – if you need to take the swingarm off, for example, can you replace rear suspension and jackshaft at the same time to keep things easier?

Order the parts you need
Head to GritShift.com and grab the first selection of parts that you need. Check to see if there are additional parts that you need to make this happen – this will be listed on the item, for example, extra wiring harness or brake pads with a kit.
Can you do the work yourself?
This is the great thing about e-moto, the bikes are much easier to work on then their gas dirt bike counterparts. Most of the upgrades can be done with some basic knowledge, and the ability to Google or watch YouTube! If you’re not comfortable making the mods yourself, you can check your local mechanics to see if they’ll do the mods for you.
There are also plenty of Facebook groups with knowledgeable members – just be sure to use common sense if anyone suggests something questionable!
The mods you need for your MX5
In the most common order, here are the parts that many riders mod for their full build:
NOTE: These are suggestions for your build, please check individual part fitment, especially if you have already started the build.
Power
Stock:
- Air cooled DC IPM Motor
- Peak output 13.4kW
- Nominal output 5.5kW
- Controller: FOC
- Battery: 72V/40Ah
Recommended upgrade:
- EBMX X9000 V3 Controller
- EBMX XTA-60 Core Motor
- Battery: Any battery that will give you the ability to deliver the power you need. You may not need to upgrade. Look at the power output you need and the range you need.
Why:
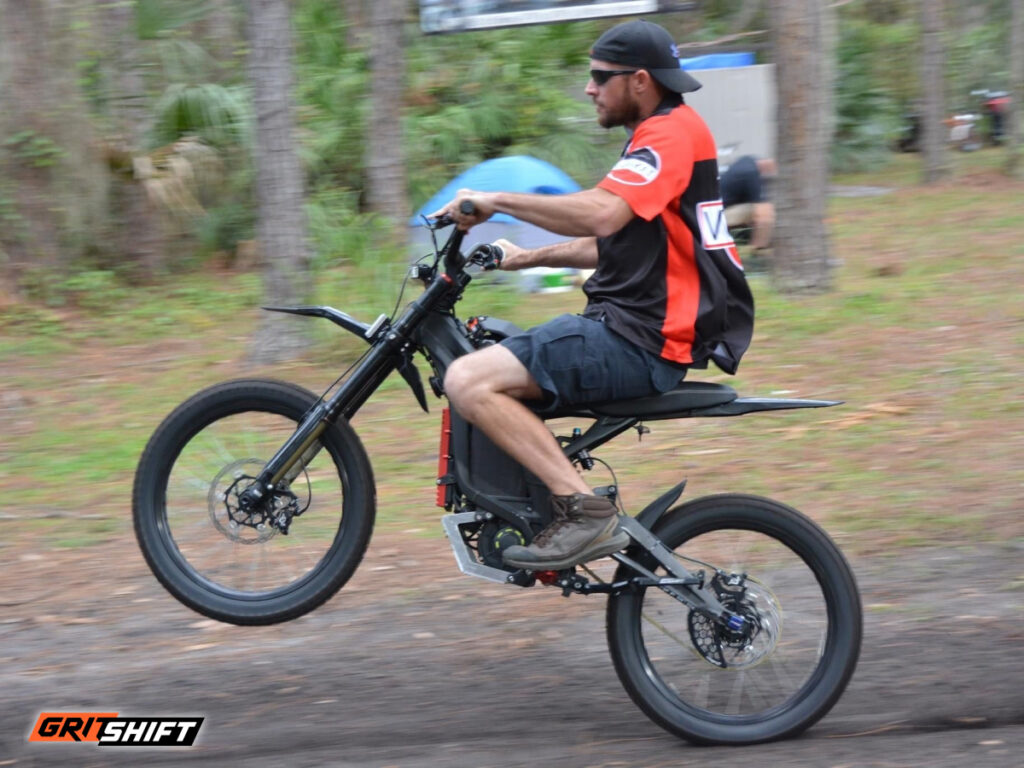
Most styles of hard riding require bigger power and more controllable, customizable power delivery. The EMBX controller is one of the best we’ve used. Most of us have it in our race bikes, and everyday bikes! It can control up to 50kW, and has a very high level of tunability. This means you can adjust the power delivery to suit your riding style. If you want it aggressive, you can tune it this way, or more of a subtle curve – it’s up to you.
When the EMBX controller is paired with the EBMX XTA-60 Core motor, watch out! Depending on the battery you want – or need – you can easily get 35kW of peak power, with instant throttle response. This will give you huge top speeds and acceleration that you’ll be needing to hold on for!

The biggest hurdle:
In our experience, the biggest challenge with building a super powerful Talaria MX5 is heat. Heat can build up from hard riding at slow speeds, but the heat issue can quickly be exacerbated by dirt and gunk building on the front of the controller, causing an insulative layer that effectively heat soak the controller. One of the reasons we switched to EBMX controllers is that their heat dissipation is fantastic, and when you’re pushing 35kW+ of peak power and pinning the motor through a fast flowing woods course, for example, you need all the dissipation you can get.
Of course, the heat issue applies to the motor as well, so we made a bundle to keep your setup cool and efficient. Check out our X9000 Bundle paired with our in-house-designed skid plate for maximum motor protection without sacrificing cooling.
Brakes
Stock:
- Front/Rear: Hydraulic Disc Brake
- DOT4 fluid
Recommended upgrade:
Why:
The brakes on the MX5 are really good, especially for e-moto standards! These brakes are similar to what you’d find on a gas dirt bike, with thick rotors, big calipers and lots of stopping power.
For those wanting extra finesse when it comes to riding technique, the ASV F3-E Super Shorty Brake Lever Set allows a short lever profile, giving you better control over your brakes. The design is very clever, incorporating a pivot design which allows the lever to flex forward instead of snapping, allowing you to finish that race, should your bike find the ground…
I’ve also added a spare set of brake pads to this upgrade. This can be seen as an upgrade, as you can choose a different compound, depending on the terrain you’re riding, but a fresh set of bedded-in brake pads before a race will give you extra stopping power.
Suspension
Stock:
- Adjustable Dual Spring Fork with 200mm travel
- Adjustable 85mm travel reducing spring shock
Recommended upgrade:
- Heavy Hitter MX Fork Conversion Kit with KTM 85 fork
- Vonkat TENfive V2 Rear Shock
- Heavy Hitter Triangle and Linkage
Why:
Firstly, the forks – The stock forks are really good on this MX5, and for most riders, it will be what you need. However, if you want to push your bike hard at a hare scramble or lap after lap and a supercross-style track, then it would be worthwhile looking into a full upgrade on the forks.
The only thing that could compete with gas dirt bikes as far as front forks go, is a gas dirt bike front fork! The MX Fork Conversion Kit allows a KTM 85 fork to fit on your MX5. The bonus is that you get an upgraded front brake at the same time.
Check out this article that explains the conversion in more detail:
For the rear suspension, I would suggest looking at the Vonkat TENfive V2 Rear Shock. Most of us at GritShift run these; they have a really good feel, allow smooth riding through rocks and perform well under braking. The extra large reservoir helps keep heat at a minimum, allowing for predictable handling without overheating issues. Yes, you can overheat a shock, too!
I would then pair the rear shock with the Heavy Hitter linkage and triangle. Created by Rusty and his team, he designed these as he found the weak link, so to speak, was the linkage and triangle, which are prone to malfunction under extreme loads.
The Heavy Hitter linkage and triangle is made from superstrong, lightweight 7075 billet aluminum and like all Heavy Hitter parts, it is easy to install. This eliminates one of the only potential hard weak points of the MX5 – we’ve had the experience of breaking the stock part so many times that we built a better one.

Driveline
Stock:
- 428 Chain
- 48T rear sprocket
- Performance-ready wheels with CST F: 70/100-19 R: 80/100-19
Recommended upgrade:
- Warp 9 rear sprocket
- Warp 9 front sprocket
- DID428 VX Series
- Wheels/tires of your choice
Why:
With extra power, you need extra grip along with extra strength in your final drive. The chain, sprocket, and tires that come stock on the MX5 are fine for stock-level riding, but when you’re starting to get competitive – even if that’s just in your own mind – you need beefier parts, along with tires made for the terrain that you’re riding.
We use and recommend the DID 428 VX Series X-Ring Chain due to its minimal friction and long life. This is also a part that I would suggest you have as spares for race day. The more power that you run, the more strain you put on the chain and increase the chances of it breaking, although this chain is one of the best we’ve found to minimise this.
Replacing the rear sprocket with a different size will give you a different power delivery to the rear wheel. Larger sizes will allow for more low-end power – better for technical trail riding and faster off the gate, where smaller sizes will allow for a faster top speed. The Warp 9 sprocket is made from high strength materials, for extra durability. Basically, it means the sprocket is designed to withstand the higher power, so it won’t dish. Check out the video below from Rusty as he explains this in more detail.
At the same time, I would suggest replacing the front sprocket with a Warp 9, again for added strength.
For some great info, check out this video from Rusty:
The tires that you choose will depend on the terrain that you’re riding, so have a look at tires great for sand, or dirt, a mixture of both to work out where you need your grip. The Sting MX5’s stock 19/19 setup is fine for most styles of riding, but again, you can switch that up based on your preference.
Frame
Stock:
- Chassis: 6061 T4 and T6 Aluminum alloy
Recommended upgrade:
Why:
The frame on the MX5 is relatively strong, and the swingarm is quite stiff. This means that you have less chance of the chain coming off the sprocket due to swingarm flex, or things simply getting bent. So, as far as the frame is concerned, there isn’t much that you’ll need to do on an MX5 to push peak performance. That’s one of the best things about it.
The bolt that holds the swingarm starts to become a weak point if you’re running higher power. The Warp 9 Titanium Swingarm Bolt Upgrade is lighter and stronger than the stock bolt, and it also has a standard 17mm nut, making track side mechanics easier.
To protect the underside of your e-moto, where all the expensive stuff is housed, I suggest getting the Heavy Hitter Skid Plate. We designed this plate when all others failed us on the track. We kept cooling, cleaning, and style in mind while building a skid plate that’s so robust it’s overkill for most riders. But it’s also peace of mind, especially for those who ride enduro. Protect that motor from the start so you won’t damage it.

Ergos
Stock:
- Handlebar length: 760mm
Recommended upgrade:
- Heavy Hitter Stem Lock
- Heavy Hitter Bar Riser
- Heavy Hitter Footpeg Brackets with Warp 9 Footpegs/Adjustable Footpeg Mount
- Ribbed Gripper Seat Cover
Why:
These mods are both for ergonomic reasons, to make the bike fit better to your body, and also for added strength.
The Heavy Hitter Bar Riser raises the bar to your preferred height – at the same time, have a think if you need to replace your handlebars/grips to your preferred combo. The stem lock holds everything in place much tighter than the stock star nut, minimising any chance for bar twist.
Similarly, we designed the Heavy Hitter Talaria Sting MX5 Footpeg Brackets to give the stock footpeg mounts extra strength under your weight. Replace the footpegs themselves to grip your boots better. Depending on your height, the Warp 9 adjustable footpeg mount could be worthwhile looking into, as it allows you to put the footpeg in different positions to be the best ergonomically for your body.
Likewise, for the seat, the ribbed Gripper seat cover grabs your butt, so you can spend less energy maintaining your best position on the bike, and more energy winning races.
Anything else?
Like anything to do with the modding process, customizing a Sting MX5 can be endless! You can modify with all the bling, with different colors, decals, and more, or keep modding for strength and systematically go through the bike, replacing literally all the nuts and bolts with stronger, lighter parts.
Take your time and think about what is really necessary. Keep in mind race entry fees, new gear and everything else that goes with competitions!

What I would do
A stock Sting MX5 can easily handle my noncompetitive track weekends, but in the back of my mind I’d be considering those mechanical limitations, like the footpeg bracket and bar mount.
I’d be thinking about those things often, especially on larger jumps and harder landings. If the MX5 were my only trackday toy, I’d eventually want to upgrade those weak points but I would probably leave the power and suspension alone – at least at first, until they started holding me back. And since I’m not chasing lap times on a Sting, the stock setup would keep me happy for a long time.
But I have other bikes to shave tenths with – if your Sting has to do it all, consider making every upgrade we talked about on this list – at great expense.
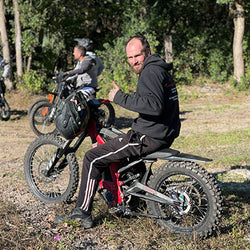
Here at GritShift, we have Talaria Stings in all different stages of mods, both across our competition team and in the commuter garage. Some of us race professionally, so those MX5s are modded with all the bells and whistles, while others like myself mod with only the essentials for a great weekend at a lazy MX track.
Just remember, if you’re reading this thinking this is a big list, stop and ask what are the most essential parts that need strengthening for your style of riding.
Even if you’re considering racing, start with a stock bike and slowly create your build. Mod for safety prior to a race or hard practise. Each session you do will provide insight into what mod you’ll need to add to your list.
But hey, I’m not your parent. If you want to throw $10,000+ at it all at once, all to create the best Sting MX5 money can buy, go for it!
If you’d like some inspo, here are some of our videos on different builds:


Leave a Reply